Chilicorn in English


Chilicorn v0.1 alpha - in English
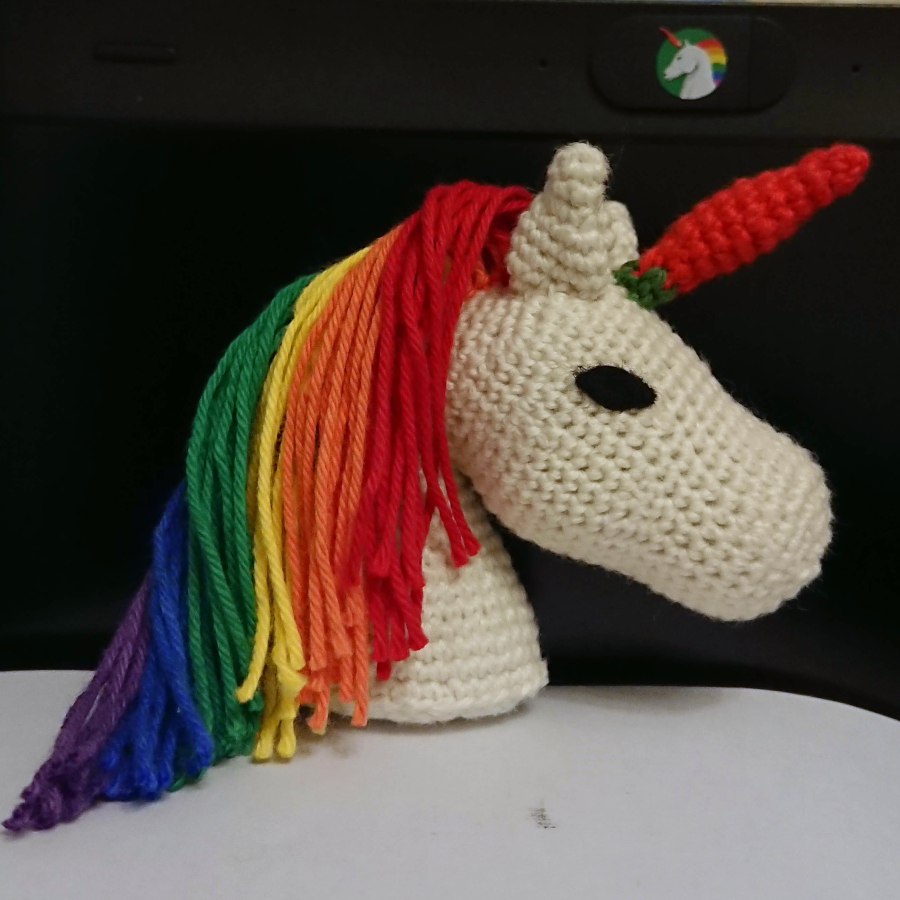
I recently got camera covers for my laptops as a souvenir gift from Tampere. These camera covers have a picture of Chilicorn - the mascot of Futurice Open Source Social Responsibility program. I heard a story that finding and getting these camera covers was a bit of a struggle and thus I wanted to make a gift in return, so I decided to develop an amigurumi pattern.
I am not yet that skilled in crochet, so this project ended up quite challenging… With some blood, sweat and tears, I finally finished a publishable version 0.1 alpha. This version is not entirely stable and the poor thing falls on its face easily. I solved this balance bug by filling the neck with small coins. It is not yet the most optimal solution, but it works.
Materials:
- Katia Amigurumi yarn (white, red, orange, yellow, green, blue, purple)
- 2.00 mm hook
- (1.75 mm hook)
- black felt
- gel glue
- fiber fill
Size:
I forgot to measure the size, but I guess it is about 7 - 8 cm tall.
Abbreviations (US english):
- sc = single crochet
- ch = chain
- tch = turning chain
- sl.st = slipstitch
- inc = increase
- dec = decrease (make invisible decrease)
Head/neck:
White yarn
- 6 sc magic ring (6)
- inc x 6 (12)
- (1 sc + inc) x 6 (18)
- (2 sc + inc) x 6 (24)
- (3 sc + inc) x 6 (30)
- (4 sc + inc) x 6 (36)
-
(5 sc + inc) x 6 (42)
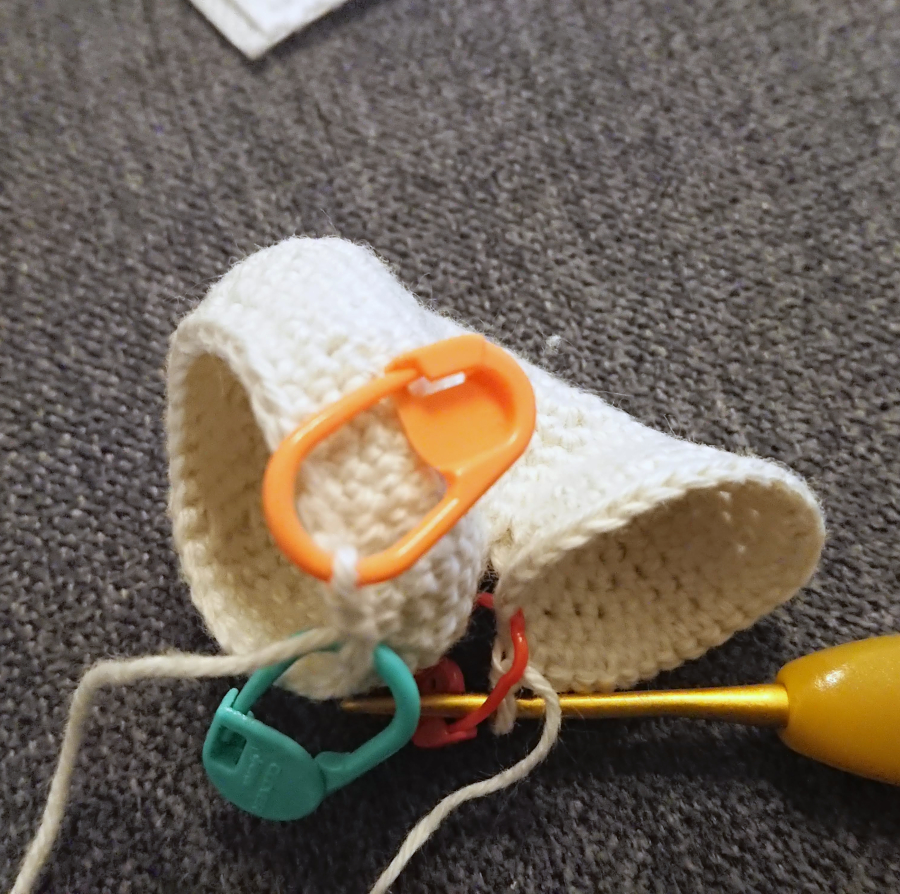
Here, divide the round into two parts, 24 stitches for the head and 18 for the neck (figure is taken few rounds later).
Head:
- 24 sc (12 sc, skip 18 stitches for the neck, and continue the last 12 sc normally)
- (3 sc + inc) x 2, 1 sc, (1 sc + inc) x 3, 1 sc, (inc + 3 sc) x 2 (31)
- (4 sc + inc) x 2, (1 sc + inc) x 2, inc, 1 sc, inc, (inc + 1 sc) x 2, (inc + 4 sc), inc, 3 sc, inc (42)
- 42 sc (42)
- (2 sc + inc) x 3, 3 sc, (1 sc + dec) x 3, (dec + 1 sc) x 3, 3 sc, (inc + 2 sc) x 3 (42)
- 42 sc (42)
- (2 sc + inc) x 2, 2 sc, (dec + 3 sc) x 3, (3 sc + dec) x 3, 2 sc, (inc + 2 sc) x2 (40)
- 1 sc, dec, 7 sc, dec, 16 sc, dec, 7 sc, dec, 1 sc (36)
- 36 sc (36)
- (dec + 1 sc) x 2, 6 sc, dec, 1 sc, 6 sc, 1 sc, dec, 6 sc, (dec + 1 sc) x 2 (30)
- 30 sc (30)
- 30 sc (30)
- (8 sc + dec) x 3 (27)
- (7 sc + dec) x 3 (24)
- 24 sc (24)
- 24 sc (24)
- (7 sc + inc) x 3 (27)
- (8 sc + inc) x 3 (30)
- 30 sc (30)
- (3 sc + dec) x 6 (24)
Fill the head firmly and continue filling until the last round. - (2 sc + dec) x 6 (18)
- (1 sc + dec) x 6 (12)
- dec x 6 (6)
End with a sl.st.
Neck
White yarn
Continue neck with the 18 stitches remaining after the division to head and neck.
- (2 sc + inc) x 6 (24)
- (1 sc + inc) x 2, 6 sc, (1 sc + inc) x 2, 6 sc, (inc + 1 sc) x 2 (30)
- 30 sc (30)
- (1 sc + inc) x 2, 9 sc, (1 sc + inc) x 2, 9 sc, (inc + 1 sc) x 2 (36)
- 36 sc (36)
- 36 sc (36)
- (1 sc + inc) x 2, 12 sc, (1 sc + inc) x 2, 12 sc, (inc + 1 sc) x 2 (42)
- 42 sc (42)
- 42 sc (42)
- (1 sc + inc) x 2, 15 sc, (1 sc + inc) x 2, 15 sc, (inc + 1 sc) x 2 (48)
- 48 sc (48)
- 48 sc (48)
- 48 sc (48)
End with a sl.st.
Ears (2x):
White yarn
I generally crochet the first few rounds with a smaller hook (here 1.75 mm) in order to make the tip sharper.
- 5 sc magic ring (5)
- inc, 4 sc (6)
- (inc, inc, 1 sc) x 2 (10)
- (inc, inc, 3 sc) x 2 (14)
- (inc, inc, inc, 4 sc) x 2 (20)
- 20 sc (20)
- 20 sc (20)
End with a sl.st. Leave enough yarn to sew the ears to the head.
Chili:
Start with red yarn
I generally crochet the first few rounds with a smaller hook (here 1.75 mm) in order to make the tip sharper.
- 4 sc magic ring (4)
- 4 sc (4)
- inc, 3 sc (5)
- inc, 4 sc (6)
- (inc + 1 sc) x 3 (9)
- 9 sc (9)
- 9 sc (9)
- 9 sc (9)
- 9 sc (9)
- dec, switch to white yarn 1 sc, switch to read yarn (dec + 1 sc) x 2 (6)
- 6 sc (6), on the last stitch switch to green yarn
- 6 sc (6)
End with a sl.st. Leave enough yarn to sew the chili to the head.
Neck bottom:
White yarn
Crochet the first two rounds with a smaller hook (1.75 mm)
- 5 ch + 1 tch (5)
- 4 sc, inc, continue to the other side 3 sc, inc (12)
- inc, 3 sc, inc x 3, 3 sc, inc x 2 (18)
- (inc + 1 sc), 3 sc, (inc + 1 sc) x 3, 3 sc, (inc + 1 sc) x 2 (24)
- (inc + 1 sc), 6 sc, (inc + 1 sc) x 3, 6 sc, (inc + 1 sc) x 2 (30)
- (inc + 1 sc), 9 sc, (inc + 1 sc) x 3, 9 sc, (inc + 1 sc) x 2 (36)
- (inc + 1 sc), 12 sc, (inc + 1 sc) x 3, 12 sc, (inc + 1 sc) x 2 (42)
End with a sl.st. Leave enough yarn to sew the bottom to the neck.
Assembly:
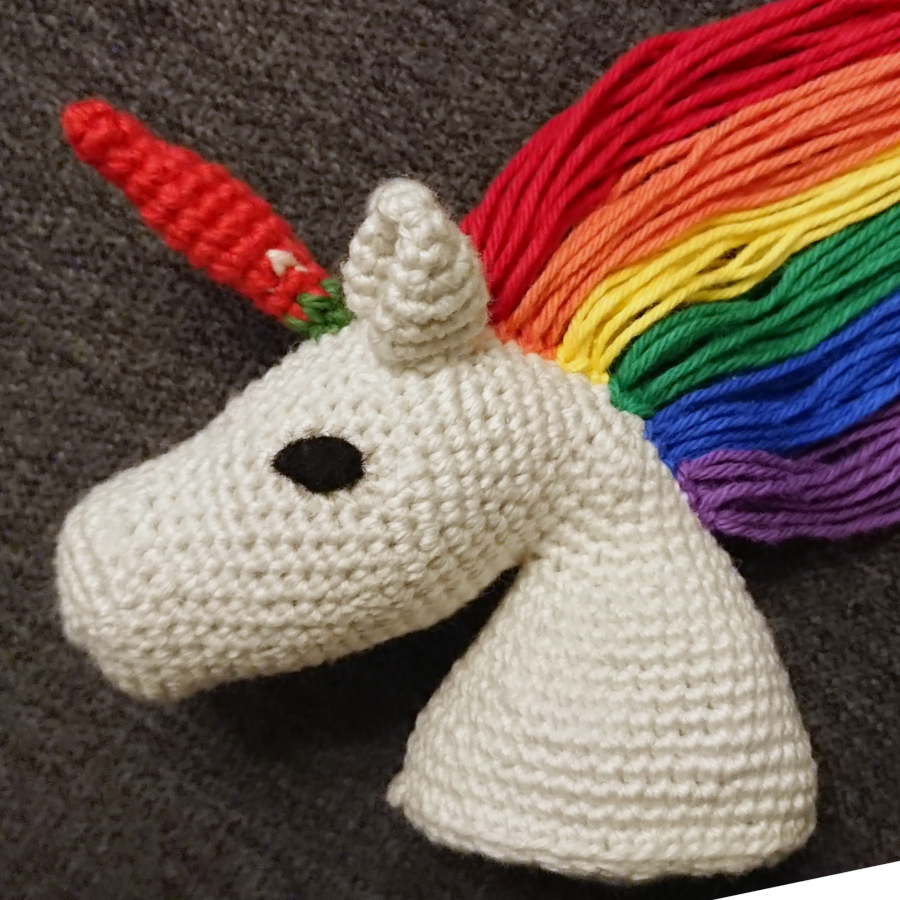
Fold the ears to make them sharp and more “horse-like” ears. Sew the ears around 7th to 11th rounds (counting from the magic ring).
Sew the chili in the middle in front of the ears. Place the white spot on the right side of the head (from front).
Cut 6x about 15-20 cm strings from each mane color yarn (test if half of the string is long enough to reach the bottom of the neck and cut a bit longer string). Attach the strings with a needle (or with a hook) such that the string goes under a stitch and forms a loop on the other side. Then pull the string ends through the loop and make it tight.
With each color, attach two strings next to each other and over three rounds (if necessary, attach the strings even closer than to the next round in order to make the mane look dense). Try to make all the loops towards the same direction, this will help the mane to curve nicely to one side.
Fill the neck with fiber fill and add something heavy to the back of the neck for balancing. I used little coins in a tiny plastic bag and covered the pile with fiber fill to make it smoother and softer.
Sew the bottom to the edges of the neck, and before closing, adjust the filling. It could be a good idea also to add a piece of firm cardboard on the bottom to make it even (the fiber fill alone might be bumpy and make the balancing even more difficult).
Cut 2x eyes out of the black felt and paste these onto the head.
Trim the mane as you wish.