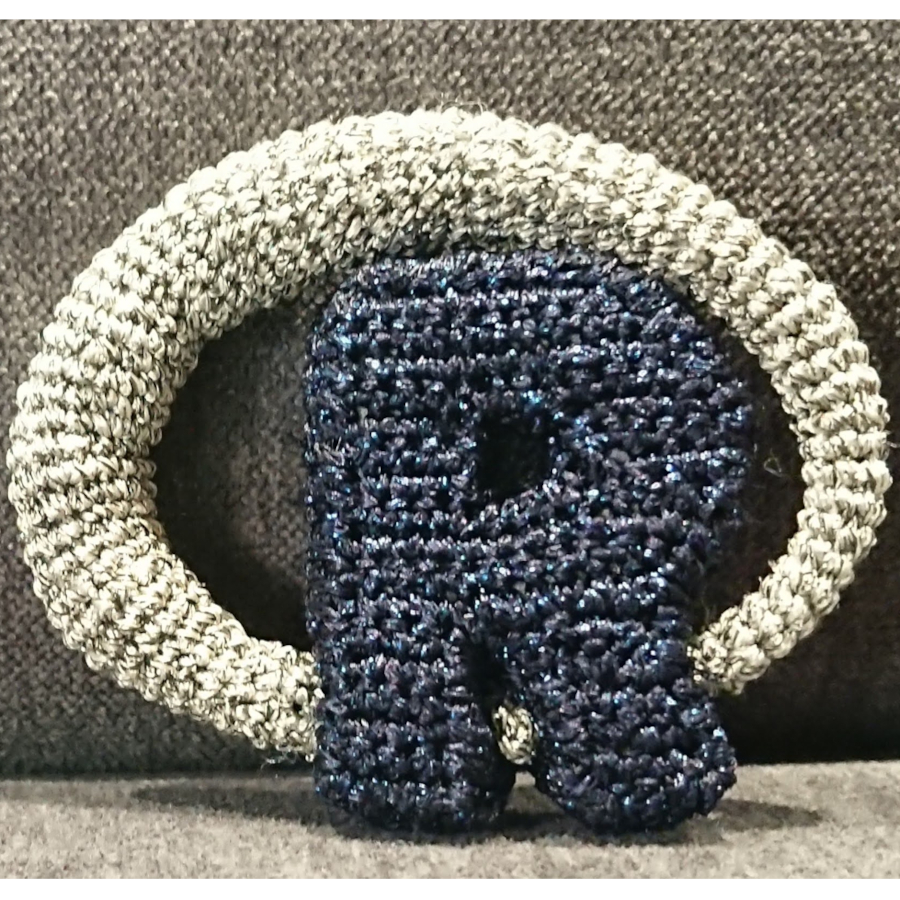
R project logo in English

R logo crochet pattern in English
I started my programming career with R and I still use it sometimes, especially when I need to produce some pretty plots. Thus, R has a special place in my heart, although I’m not that eager to use it now that I’ve learned python.
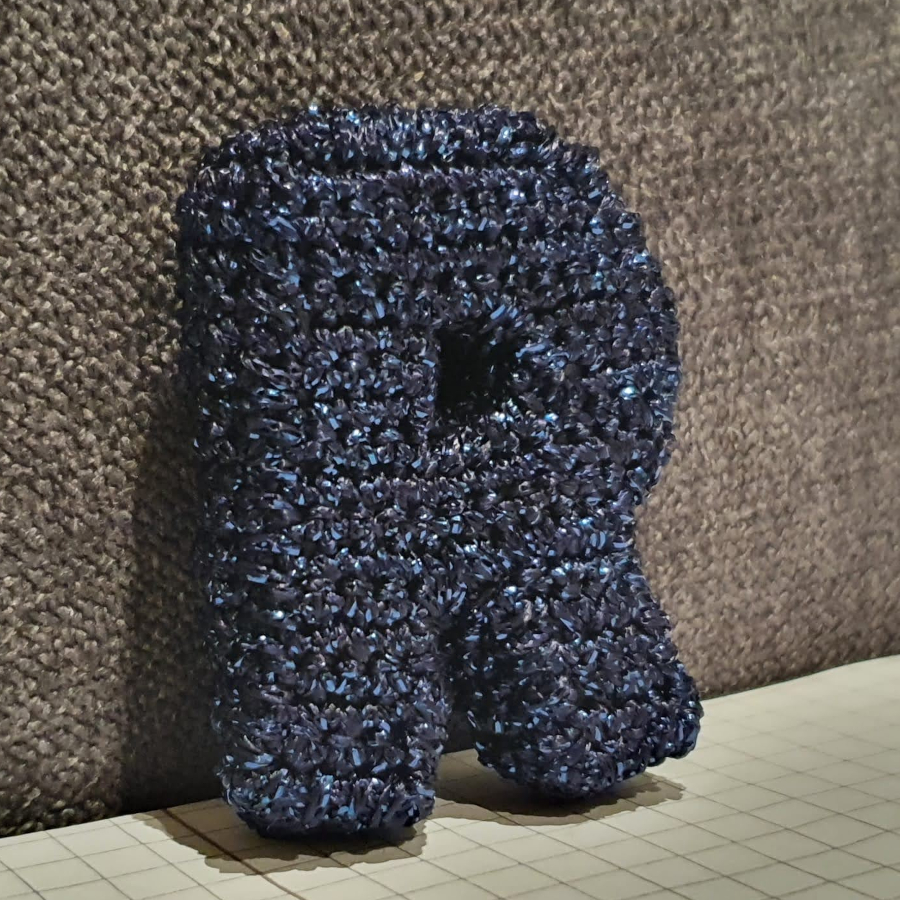
Recently I’ve had quite a crochet mania - I’ve been producing my own patterns as well as using existing patterns to crochet different programming related amigurumis and, of course, I had to make also R logo. I couldn’t find a satisfying pattern for letter R and ended up modifying CrochetCircle’s pattern to smaller and angular format instead of flat sides.
From my almost-forgotten stash of yarn, I found Anchor artiste metallic yarns. This is annoyingly hard yarn, not that pleasant for crocheting but the logo looks fancier with the glitter (and the yarn hides all mistakes). Furthermore, glittery looks makes the logo usable for example as a Christmas tree decoration.
Materiaalit:
- Anchor artiste metallic, dark blue
- Anchor artiste metallic, silver
- 1.75 mm hook
- fiber fill
- metal wire (~1-2 mm)
Koko:
R
- 5 x 4 x 1 cm
Entire logo
- 6 x 7.5 x 1.2 cm
Abbreviations (US english):
- sc = single crochet
- ch = chain stitch
- sl.st = slipstitch
- inc = increase
- dec = decrease
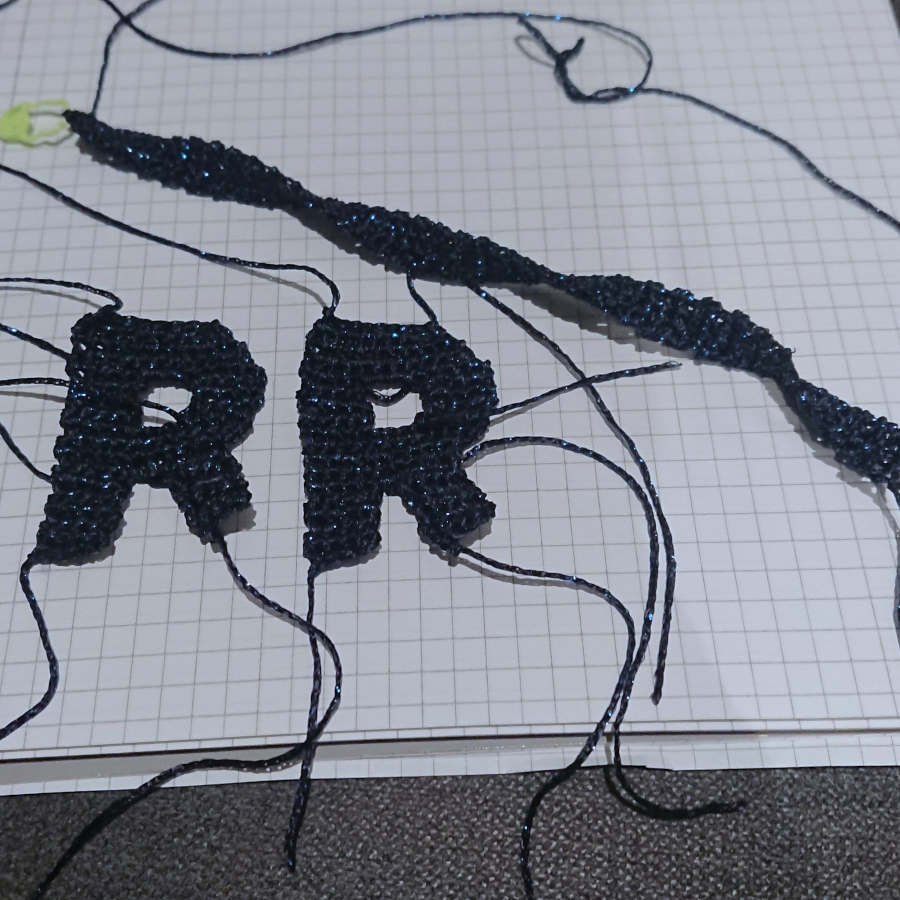
R (2x)
Dark blue yarn
- ch 5
- 4 sc (4), turn
- ch 1, 4 sc (4), turn
- ch 1, 4 sc (4), turn
- ch 1, 4 sc (4), turn
- ch 1, 4 sc (4), turn
- ch 1, 4 sc, 6 ch 1, turn
- inc (from 2nd stitch), 8 sc (10), turn
- ch 1, 9 sc, inc (11), turn
- ch 1, inc, 10 sc (12), turn
- ch 1, 4 sc (4), turn
- ch 1, 4 sc (4), turn
- ch 1, 4 sc (4)
Leave enough yarn to weave in the end.
Continue without turning
- ch 1 to 4th stitch
- 4 sc (4), turn
- ch 1, inc, 1 sc, dec (4), turn
- ch 1, inc, 3 sc (5), turn
- dec, 2 sc, inc, ch 3, 4 sc (these 4 sc to the previously made part) (12), turn
- ch 1, 10 sc, dec (11), turn
- ch 1, 11 sc (11), turn
- ch 1, 9 sc, dec (10), turn
- dec, 8 sc (9)
Leave enough yarn to weave in the end.
Turn the P upside down and start by making 1 ch into the leg’s corner
- dec, 3 sc (4), turn
- ch 1, inc, 1 sc, dec (4), turn
- ch 1, dec, 1 sc, inc (4), turn
- ch 1, 4 sc (4), turn
- ch 1, dec, 1 sc, inc (4), turn
- ch 1, 4 sc (4)
Leave enough yarn to weave in the end.
R sides (2x)
Dark blue yarn
Make 2 side pieces, one is longer (outer side) and another one quite short (R inner part). Measure the length while you crochet by assembling the side piece loosely around the R. It is easiest to crochet a bit longer piece than what is actually needed, place a stitch mark to the last stitch and leave a lot of yarn. Once the side piece is mostly sewed to R, you’ll understand whether you’ll need to crochet more or unwind in order to get a perfect fit.
- ch 4
- 3 sc (3), turn
- ch 1, 3 sc (3)
- continue 3. until the piece is long enough
R assembly
- Sew the outer side piece to front R row by row. Be very careful at the corners in order not to make them too tight but also not too loose.
- When you proceed sewing, you’ll notice whether the side piece length fits or if you’ll need to crochet more rows or unwind some if it is too long.
- Sew the side piece to inner part of the R similarly.
- Sew the back R first to the inner side piece. Place it carefully to correct position from the corners.
- Continue sewing the back R starting from the top corner and continuing straight down row by row carefully matching the position. While you sew, fill in with the fiber fill. It is important not to leave the filling too late so that you’ll get the corners stuffed firmly as well.
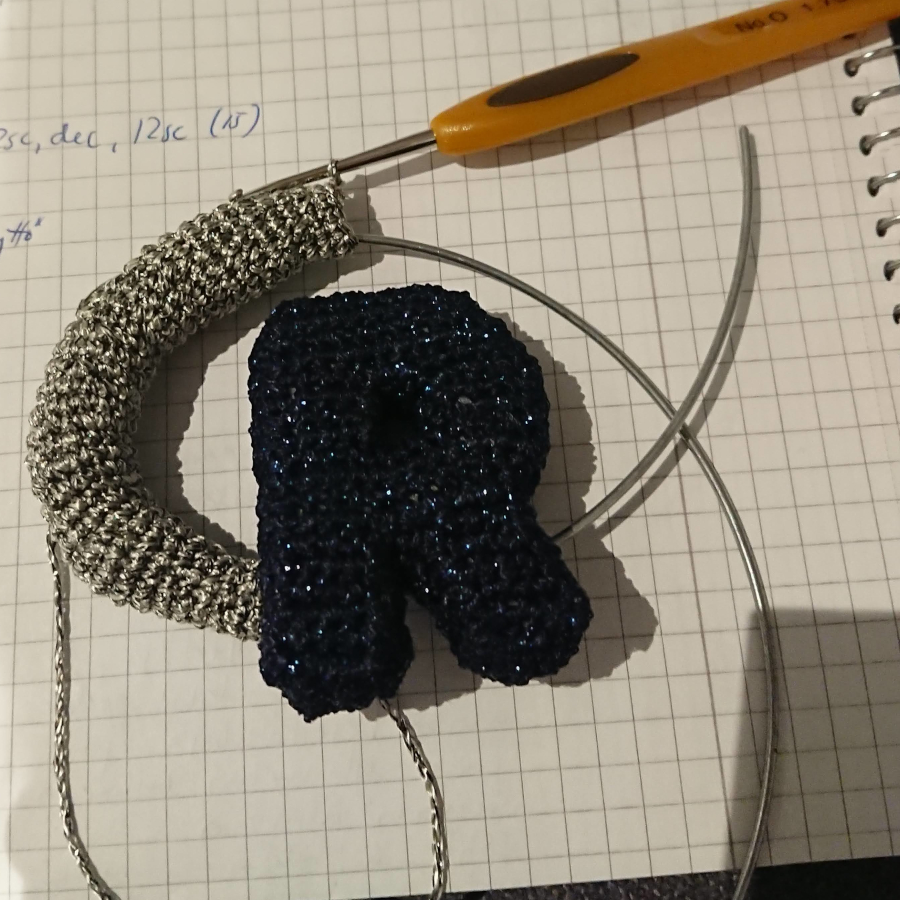
Logo frame
Silver yarn
This instruction is only approximate note and not perfect at all. The number of rows depends heavily on how tight you crochet and how you place and bend the wire. The yarn was not the easiest one, and it was difficult to keep the stitch count plus I was quite lazy to fix and write down everything. The earlier you place the wire in and start filling, the better result you’ll get. Keep testing the frame around R to understand how you’ll need to bend and how many rows you’ll need.
- ch 10, close as a circle with a sl.st
- 10 sc (10)
- 10 sc (10)
- inc, 9 sc (11)
- 11 sc (11)
- inc, 5 sc, inc 4 sc (13)
- 13 sc (13)
- inc, 3 sc, inc, 4 sc, inc, 3 sc (16)
- 16 sc (16)
- dec, 1 sc, dec, 1 sc, dec, 1 sc, inc, 1 sc, inc, 1 sc, inc, 2 sc (16)
- 16 sc (16)
- dec, 1 sc, dec, 1 sc, dec, 1 sc, inc, 1 sc, inc, 1 sc, inc, 2 sc (16)
- 16 sc (16)
- 16 sc (16)
- dec, 1 sc, dec, 1 sc, inc, 1 sc, inc, 1 sc, inc, 2 sc, dec, 1 sc (16)
- 16 sc (16)
- 16 sc (16)
- 1 sc, dec, 1 sc, inc, 1 sc, inc, 1 sc, inc, 2 sc, dec, 1 sc, dec (16)
- 16 sc (16)
- 16 sc (16)
- dec, 1 sc, dec, 1 sc, dec, 1 sc, inc, 1 sc, inc, 1 sc, inc, 2 sc (16)
- 16 sc (16)
- 16 sc (16)
- 1 sc, dec, 1 sc, dec, 1 sc, inc, 1 sc, inc, 1 sc, inc, 2 sc, dec (16)
- 16 sc (16)
- 16 sc (16)
- 16 sc (16)
- 2 sc, dec, 12 sc (15)
- 15 sc (15)
- 2 sc, dec, 11 sc (14)
- 14 sc (14) - latest here place the wire in and start filling, continue filling regularly
- 2 sc, dec, 10 sc (13)
- 13 sc (13)
- dec, 11 sc (12)
- 12 sc (12)
- 1 sc, dec, 9 sc (11)
- 11 sc (11)
- 11 sc (11)
- 11 sc (11)
- 11 sc (11)
- 3 sc, dec, 6 sc (10)
- 10 sc (10)
- 10 sc (10)
- 10 sc (10)
- dec, 8 sc (9)
- 9 sc (9)
- 9 sc (9)
- 1 sc, dec, 6 sc (8)
- 8 sc (8)
- 8 sc (8)
- 1 sc, dec, 5 sc (7)
- 7 sc (7)
- 7 sc (7)
- 7 sc (7)
- 1 sc, dec, 4 sc (6)
- 6 sc (6)
- 6 sc (6)
- 6 sc (6)
- 6 sc (6)
- 6 sc (6)
- 6 sc (6)
End with a sl.st. Leave enough yarn to sew the frame to R.
Frame piece between the R legs
Silver yarn
- ch 6
- 4 sc Leave enough yarn to sew the piece to R.
Logo assembly
- Bend the frame to correct format.
- Cut the metal wire such that it is completely inside the frame, fill the frame ends if needed.
- Start attaching the frame to R from the wider part of the frame. Finally, pull the yarn through the R legs according to the “frame line” and continue attaching the narrow side of the frame to the front of the R. Finish by pulling the yarn through the R legs to the wider side of the frame and weave in all ends.
- Attach the frame piece between the R legs by sewing the piece around the yarn as a circle. Sew the piece sides to the R legs.